How to Make Your Own Emergency Dry Food Storage Supply
Creating an emergency food supply is an excellent way to prepare your household in advance for whatever challenges may arise. You can do this little by little or in one fell swoop. Here’s how we created our basement emergency dry food storage supply.

Why create an emergency food supply?
Having an emergency food supply is sort of like having a financial emergency fund. It simply limits stress by preparing you (and your family) for the whatever might happen in the future.
Whether you face a food shortage or a natural disaster, being prepared will allow you to take responsibility for your own family. You won’t have to race to the store to try to grab the last bag of rice off the shelf, because your basement will already be stocked. Your family will be cared for!
Long-term food storage is an easy way to give yourself peace of mind in case of anything from natural disasters to a longer-term emergency situation.
You don’t have create your food supply all at once
Creating an emergency food supply is an investment, but fortunately, you don’t have to do it all at once. You can totally seal up some buckets now and add a few more buckets down the road.
What foods can be stored for a long time?
For this project, we used 5-gallon buckets, mylar bags, and and a heat sealer to store dry food items like beans and rice. These foods can be safely stored for 10 years or even more when packaged correctly.
Long term storage of these types of items is great for survival food that could stretch for many days and weeks.
But there are also lots of other foods you can easily keep in a storage area for many months or even multiple years that would provide more variety and nutritional value in case of an emergency situation. And many of them can simply be purchased at your local grocery store. Emergency preparedness doesn’t always have to be a big project.
When planning an emergency food ration, think about what types of foods your family eats, as well as any allergies or diet restrictions. You’re preparing in advance, so you have the flexibility to choose foods that work for you and your family.
Here are some ideas of foods that can be stored for a long time:
Canned foods
Most canned foods last for at least a couple of years. Canned vegetables, fruits, soups, and other items are easy to pick up at the grocery store and make it simple to have a variety of items on hand in case of a shortage or emergency. Home canned foods stored in glass jars can also last for a year or longer when stored in a cool, dry place out of direct sunlight. Just remember that if you’re going to store canned foods, you should also have at least one can opener always on hand!
Dehydrated foods
Dehydrated foods can keep for many months depending on their storage conditions. Thoroughly drying your foods and keeping them in a cool, dark place are the best ways ensure a long shelf life. Dehydrating is a great way to preserve your fresh produce, herbs, and even meat.
Freeze-dried foods
If you have a freeze dryer, you can store foods for up to 25 years! Because freeze drying removes so much of the moisture content from foods (98%-99%), this method can keep food for such a long time. Freeze drying also maintains almost all of the nutritional benefits of the food. But – this method is understandably a much more costly investment!
Root vegetables
Root vegetables are easy to stash away because they don’t require any preparation. Squash, potatoes, onions, beets, and turnips can be stored in a cool, dry place like a basement or root cellar for many months.
Frozen foods
Stocking your freezer is another good way to store many different types of food for long periods of time. Freezing is ideal for perishable food – anything from vegetables to meat to pre-made casseroles to bread can be stored for many months in the freezer. Obviously, this option isn’t great if you lose power, unless you have a backup generator and gas on hand. But for emergencies such as food shortages and supply chain issues, having a good freezer stash can provide a variety of foods to meet your nutritional needs.
What are the best foods to store long-term for food shortage emergencies?
For this particular project, we wanted to have extra food stored in 5-gallon tubs that could be kept for many years. Dry food storage tubs paired with mylar bags and oxygen absorbers can keep food safe for decades. We chose to seal half of our tubs for a true emergency.
For the other half, we used food-grade buckets with Gamma lids and simply dumped the food in. These are tubs that we access often. It’s makes cooking simple to know that there’s always plenty of rice and beans in the basement when we need them!
Here are some ideas for dry foods that are excellent for long-term storage:
- Dry beans, such as black beans, pinto beans, kidney beans, navy beans, and garbanzo beans
- Lentils
- White rice
- Flour
- Sugar
- Oats
- Quinoa
- Split peas
- Dry milk
For our dry food storage supply, we’re focusing mostly on rice and beans. We eat a lot of both of these foods and they’re calorie-dense, so they make the most sense for us.

Where to purchase rice and beans for long-term storage
A lot of people choose to purchase bulk foods for emergency food storage. Azure Standard and Country Life Natural Foods are a couple of good options if you choose to go this route.
We used Country Life for awhile, and it was definitely convenient to order 50-pound bags of food rather than having to purchase 1- or 2-pound bags every week at the grocery store.
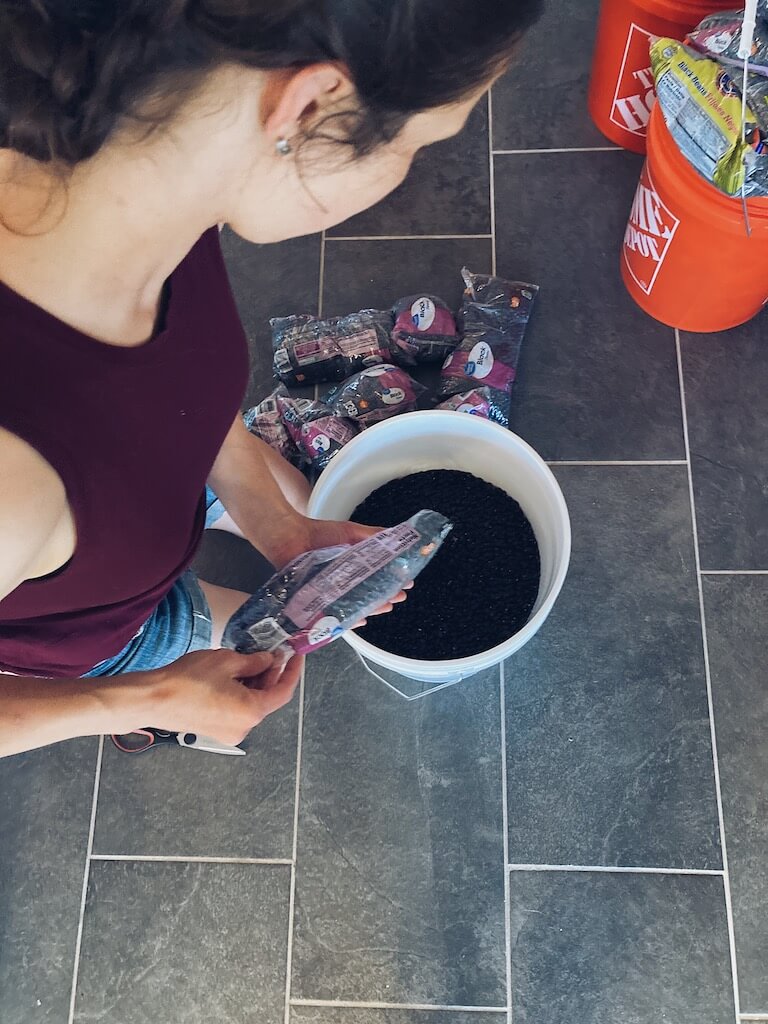
Unfortunately, bulk food prices have increased drastically, and we found that purchasing bulk food became quite a bit more expensive. After researching around, I’ve found the best deal to be smaller bags of rice and beans from Walmart. Most bags are only 1 to 5 pounds, but they do have bigger bags (8 pounds) for certain items like pinto beans.

Where is the best place to store dry food?
The best place to store dry food (such as rice and beans) for long-term storage is in a cool, dark area. Keep them away from sunlight, humidity, and hot temperatures, which tend to degrade the food and can greatly reduce their shelf life. Basements usually work very well for food storage.
Tips for creating an emergency dry food supply
Here are a few things we learned from creating our basement food supply.
1. Sometimes buying in bulk is not cheaper
I wish buying in bulk was always cheaper, but the reality is that it’s sometimes not. Purchasing our beans and rice from Walmart ended up saving us money, even though it took a few trips to get everything we needed.
2. Choose white rice vs. brown rice
We eat brown rice almost exclusively, so that’s what we purchased for our basement emergency food supply. After doing more research, I realized that brown rice can go bad much more easily and quickly than white rice. This is because brown rice has a high oil content that can go rancid.
We still packaged our brown rice, sealing some in Mylar bags and even freezing some. However, we are planning to use it up within 6-12 months and store some white rice in addition.
3. Not all buckets need to be food safe – save some money!
For our food storage pantry, we’re creating two buckets for each item (for example: 2 buckets of rice, 2 buckets of pinto beans, 2 buckets of black beans, etc.).
One bucket is a regular, 5-gallon bucket that’s not food safe because it has a sealed Mylar bag inside. We’re not planning to touch these buckets unless we have to, and the food can last approximately 30 years!
The other bucket is food safe, and we’ll be getting into these fairly often. We used Gamma Seal lids for these buckets to make usage a bit easier.

4. Use a hair straightener to seal your bags
You don’t need to purchase a fancy tool to seal your Mylar bags. A hair straightener works really well.

Supplies you’ll need for a basement dry food storage supply
- Dry food, such as rice, beans, lentils, oats, flour, sugar, etc.
- 5-gallon buckets
- Mylar bags and oxygen absorbers
- Hair straightener or heat sealer
How to create an emergency dry food storage supply
- Make sure your 5-gallon buckets and lids are clean and completely dry.
- Insert your mylar bag into the bucket (BEFORE dumping your food in).
- Fill with beans, rice, or whatever food you’d like to store.
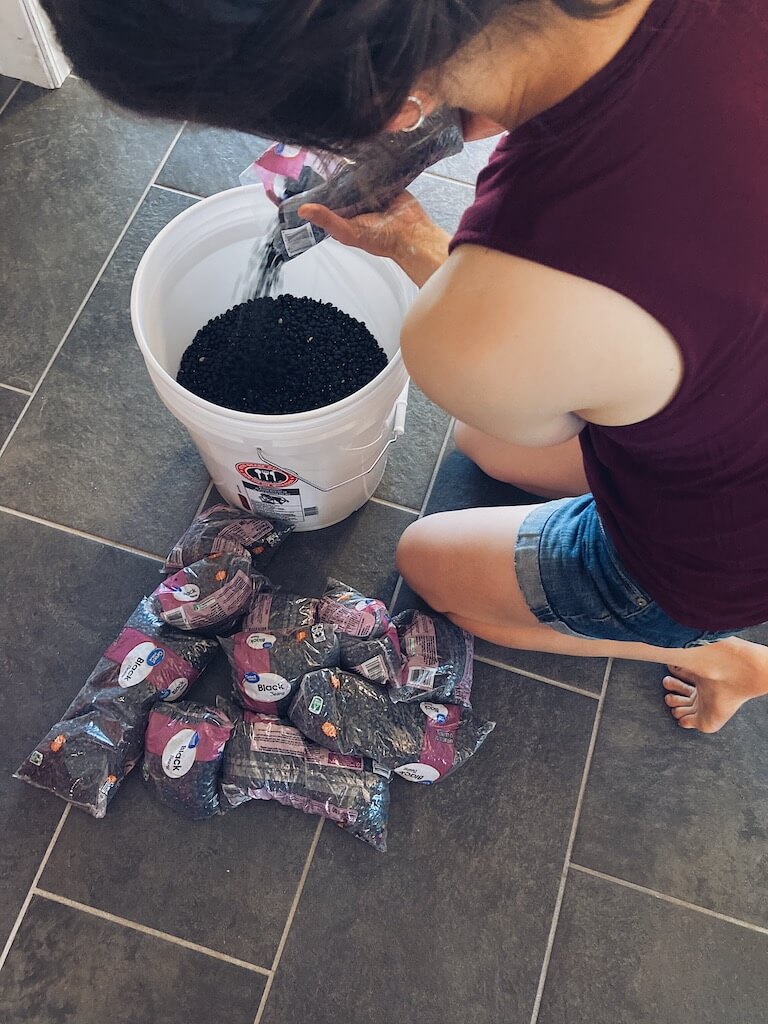
- Add an oxygen absorber (do not use oxygen absorbers for sugar – they’re not needed and will harden the sugar).
- Seal your bags using a hair straightener or heat sealer.

- Add lids and labels.
Tips for storing emergency food in small spaces
We love that 5-gallon tubs are easy to store in the basement and are significantly protected from the elements, like mice and even the occasional water that collects on the concrete floor.
But if you don’t have a basement or live in a small space or even an apartment, you can still find different ways to keep months of food and other emergency supplies available – you might just have to get creative! Here are a few ideas:
- Store flats of cans under couches or beds. Both canned foods from the store and sealed Mason jars are not very tall. You can easily keep dozens of canned food supplies under small spaces like couches, tucked away from sight. This is one of the easiest ways to find more storage space – no extra equipment required!
- Keep emergency food on top of cabinets. The tops of cabinets often provide many square feet of storage space that typically goes unused. This can be a great place to keep cans, and dehydrated or freeze-dried foods. The important thing is to make sure they don’t get too hot or too much sun.
- Keep 5-gallon buckets under beds. If your’e serious about 5-gallon tubs, consider putting your bed on risers so that you can fit tubs of dry food underneath. This is an easy way to do long term food storage without taking up extra space!
- Get to know your local farmers. Depending on the emergency, your local farmers might not be affected at all, even if the grocery stores are struggling to keep the shelves stocked. Getting to know your local farmers before an emergency happens is a great way to prepare for shortages. With the right connections, you may be able to have access to dairy products, fresh produce, and meats.
Pin this post for later!

Related posts