• The Nuclear Family
    • Kids and Family
    • Mothering
    • Marriage
    • Neighboring
  • Self-Sufficiency
    • Hunting
    • Foraging
    • Self-sufficiency
  • Money-Saving
  • Side Hustles
    • Facebook Marketplace
  • Productivity
  • In The Kitchen
    • Breakfast
    • Dinner
    • Side dishes
    • Snacks
A Productive Household

A Productive Household

Recovering the family that creates value together

  • Blog
  • About
  • Shop
  • Contact

Cost Analysis of Cooking Your Own Beans

In The Kitchen

Tweet
Share
Pin5
5 Shares

Beans are a major staple in our house. They’re an excellent source of fiber and protein. They’re also filling, nutrient-rich, and versatile, and cheap! We eat beans multiple times a week in a variety of dishes. This cost analysis of cooking your own beans is just one reason why I love to cook my own beans rather than buying canned.

cost analysis of canning your own beans ball jars with cooked black beans

This post contains affiliate links, which means we make a small commission at no extra cost to you. See our full disclosure here.

Cost analysis of cooking your own beans

Now that I’ve been cooking my own beans for awhile, I got curious about a cost analysis and how the price of dry beans compares to canned beans. However, cost is definitely not the only reason why I love to cook my own beans.

Why cook your own beans?

  • It’s cheaper. Keep reading to find out how much cheaper!
  • They’re tastier. Beans cooked at home from dry have better texture and flavor than beans that have been sitting on a shelf in an aluminum can for months.
  • No preservatives. You can totally avoid all the preservatives that come along with buying pre-canned foods from the grocery store, with hardly any extra work!
  • You can flavor them however you want. Though I usually just flavor my beans with a sprinkle of salt, you can add all kinds of spices to make your beans taste just how you like.
  • They’re super easy to make. Beans are one of the easiest things to make at home, especially if you have a slow cooker.
  • They simplify grocery shopping. Maybe it’s just me, but I thoroughly dislike pulling up to the checkout counter with 30 aluminum cans. Bagging them, and loading and unloading (especially while carrying two littles) is just not my cup of tea. Dried beans are just way easier to buy, and easier to order online, too.
  • More variety. There are way more options available when you’re buying dry beans!

Is it cheaper to cook your own beans?

As you’ll see, cooking your own beans is not only tastier, easier, and more flavorful, but also way cheaper than buying pre-canned beans at the store. I’ve found that cooking my own beans costs about half the price. If you eat lots of beans like we do, this can totally add up!

Cost analysis of cooking your own beans

I decided to do this cost analysis using the three types of beans that I cook most often: black beans, Great Northern (white) Beans, and chick peas. Here’s what I found:

Black Beans – Two pounds (32 oz) of Black Beans cost me $2.22 at Walmart. After they were cooked, I ended up with the equivalent of about 7 cans of beans, for a total of approximately $0.32 per can. One can of cooked beans at Walmart costs $0.62.

Great Northern Beans – Two pounds (32 oz) of Great Northern Beans cost me $1.98 at Walmart. After they were cooked, I ended up with the equivalent of about 6 cans of beans, for a total of approximately $0.33 per can. One can of cooked beans at Walmart costs $0.62.

Chick Peas – One pound (16 oz) of chick peas cost me $1.28 at Walmart. After they were cooked, I ended up with the equivalent of about 4.5 cans of beans, for a total of approximately $0.28 per can. One can of cooked beans at Walmart costs $0.62.

Cooking your own beans is about half the price!

cost analysis of dry white beans in a colander

How to cook beans in a slow cooker

There are multiple ways to cook your own beans, but the slow cooker method is my favorite. It’s just super easy and you don’t really have to think about timing that much. Using the slow cooker, I can be way more engaged with my kids or whatever else I’m doing rather than standing over the stove constantly checking on my beans.

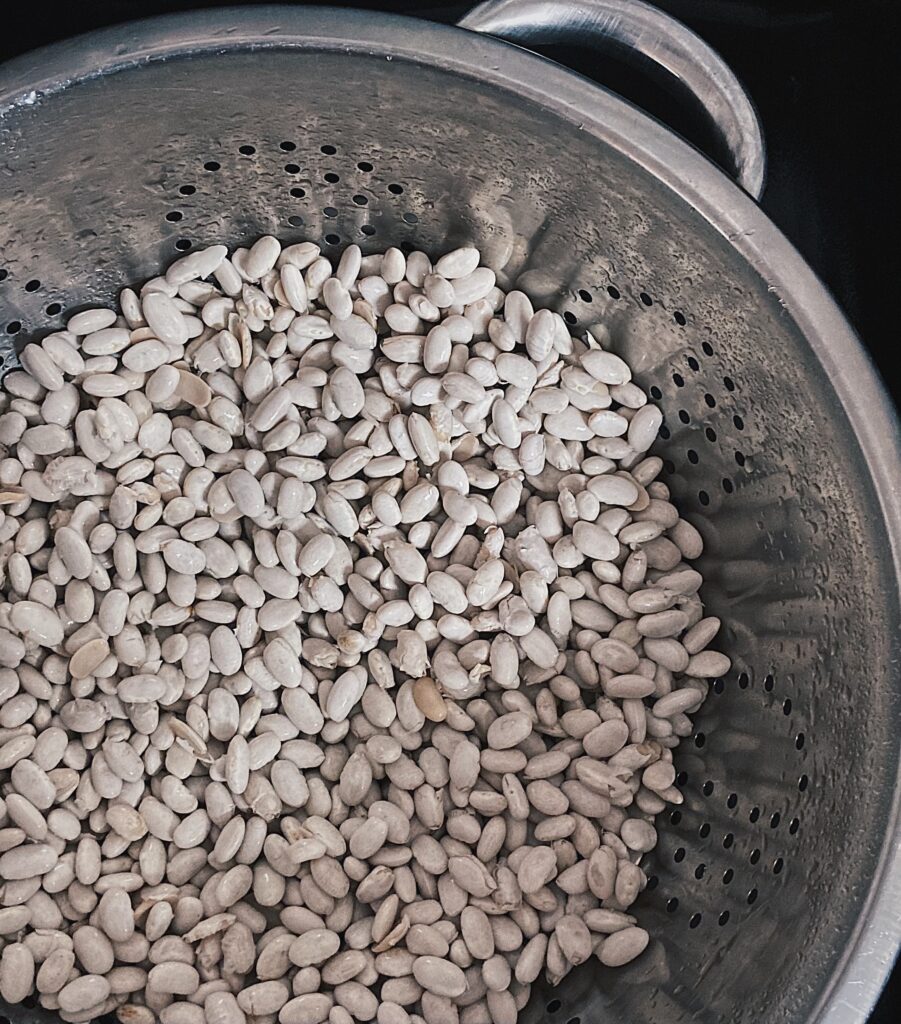
  1. Rinse your beans and pick them over. I use this 6-quart slow cooker and can fit 2-3 pounds of dry beans per batch (depending on the type of beans). Start by dumping your beans in a colander. Rinse them, and then pick through them, removing discolored beans or small rocks.
    black beans being washed in colander
  2. Soak them overnight. You obviously need to think of this ahead of time, which is one downside to cooking your own beans. I’ve found that with a little planning, this isn’t really an issue. Put your washed and sorted beans in a bowl and cover them with water, about two inches above the top of the beans. They’ll soak up a lot of water.
  3. Drain and season. In the morning, drain the water from the beans. Put them in the slow cooker and cover them with new water. Be sure to add enough water to cover them by about an inch. Then, season the beans however you like! I usually just sprinkle them with salt, but you can add anything you like, really. Onion, garlic, bay leaf, pepper…the possibilities are endless.
    black beans covered in water in slow cooker
  4. Cook. Cooking time varies depending on the type of bean and the slow cooker. I set my slow cooker to low and start checking on it after about 3 hours. Some beans take closer to 6 hours, so just check them every half hour or so until you figure out how long your beans and your slow cooker take. I find that black beans take the longest (about 6 hours) while chick peas don’t take very long (closer to 3 or 4 hours), but this depends on your beans and your slow cooker. Keep in mind that they can finish cooking quickly, so be sure to check them often once you hit that 3-hour mark.
    cooked black beans in crockpot
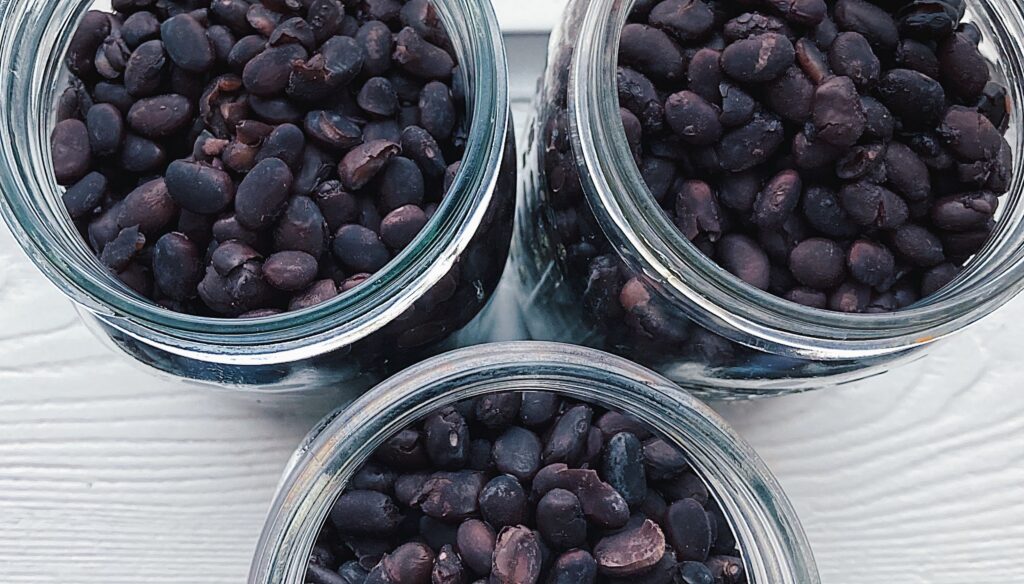
  5. Store your beans. Ladle the beans into glass jars with a little bit of cooking liquid. You can then eat them right away, or store them in the refrigerator or freezer.

How to store cooked beans

You can store your beans in the refrigerator for about 3-5 days. In the freezer, they’ll last up to 6 months. Just be sure that you leave a little room for the liquid to expand if you use the freezer method.

cost analysis of canning your own beans three canning jars with black beans

How long does it take to defrost frozen beans?

If you store your beans in the freezer, be sure to leave an adequate amount of time for them to defrost when you’re ready to use them. I find that it takes a good chunk of the day to defrost them, so I’ll try to pull them out in the morning if I want to use them for dinner. I’ve had many occasions when I didn’t take them out until afternoon. You can probably finagle them out of the jar with a spoon to warm them up, but it ends up squishing and messing with the texture of the beans. Avoid this if you can!

Do I have to soak my beans before cooking?

You do not have to soak your beans before cooking. Soaking beans simply helps them to cook faster and more easily. You’ll have fewer split beans when you soak them overnight first. It also makes them easier to digest.

If you forget to soak your beans, you can use the quick-soak method. To quick-soak your beans, rinse them in a colander and sort them to remove any stones or debris. Next, cover them with water in a pot and bring to a boil. Once they’ve begun to boil, remove them from the heat, cover, and let them stand for at least one hour. (Note: this is simply a soaking method. You will still need to cook the beans.)

Family favorite bean recipes

We have so many favorite bean recipes that it’s hard to choose! Here are a few of our favorite ways to use home-cooked beans.

Flavorful Chickpeas and Rice

Slow Cooker Refried Beans

Crispy Black Bean Tacos with Avocado Lime Sauce

Tweet
Share
Pin5
5 Shares

February 20, 2022 · Leave a Comment

Subscribe to get the latest

By subscribing to our newsletter, you consent to receive new post updates and occasional promotional emails related to our company.

Next Post: Chores Your One-Year-Old Can Help With »

Reader Interactions

Leave a Reply Cancel reply

Your email address will not be published. Required fields are marked *

Primary Sidebar

Let’s Connect

  • Email
  • Instagram
  • Pinterest

We’re glad you’re here!

Hello! We’re the Finches. We’re here to share what our family is learning about using our time to create value through the homefront. Join us!

You can read more about us here.

never miss a post!

By subscribing to our newsletter, you consent to receive new post updates and occasional promotional emails related to our company.

Latest on Instagram

aproductivehousehold

aproductivehousehold
The other day, I spent the afternoon making yogurt The other day, I spent the afternoon making yogurt and baby food and homemade lemonade while listening to @dr.ashleyturner , and I couldn't help thinking about what a gift it is to be constantly learning.

Especially during this time of year, it’s easy to become overwhelmed by how MANY opportunities there are. There is so much that I could learn, cook, preserve, do. So many people offering free vegetables that I could do something with. 😂

But time and resources are limited, and that is okay! It’s okay to say no to things that may be good but not BEST.

I’d love to make pickles, but there are other foods that my family eats more and would be a better use of my time. 

I’d love to grow all the fall crops, but I don’t have the space or time.

I’ve become totally okay with saying no to some opportunities and not feeling guilty. There are always more opportunities to learn and grow. 

Do the next thing and keep learning a little each year!

#aproductivehousehold #homemadebabyfood #homemadeyogurt #foodpreservation #onethingatatime
10-MINUTE DATE ENERGY BARS I'm always looking for 10-MINUTE DATE ENERGY BARS

I'm always looking for healthy snacks that we can take in the car or that I can feed to the kids quickly without making a mess (or with minimal mess at least). 

I made these date bars the other day with some of our favorite ingredients, and they were so easy. I actually made them out of slight desperation and laziness because I was so tired of rolling peanut butter energy bites into balls. (Does anyone else make these and extremely dislike a bunch of messy, sticky peanut butter on your hands?)

Anyway, I wanted to share the recipe with you here!

10-MINUTE DATE ENERGY BARS 

Ingredients:

1 cup dates
1/2 cup apricots
1/2 cup sunflower seeds
1/2 cup walnuts
2 Tablespoons chia seeds
1 teaspoon cinnamon

To make:

1. Add all ingredients to a food processor and pulse
2. Line a 9" x 9" pan with parchment paper
3. Press mixture into pan to form into a square
4. Lift parchment paper out of pan to cut energy bars
5. Store cut bars in a plastic container in the refrigerator (use strips of parchment paper between the layers to prevent sticking to each other)

That's it! Let me know if you try them!

I also posted this on the blog with more ingredient ideas. I love that you can totally use whatever ingredients you have or like best, just as long as there's enough dried fruit to make them really stick together.

https://aproductivehousehold.com/10-minute-date-energy-bars-no-sugar-added

#dateenergybars #nosugaraddedsnacks #healthysnacksforkids #healthysnacks #homemadesnacks #datebars #energybars #easysnacks
"Let us, then, be up and doing, With a heart for a "Let us, then, be up and doing,
With a heart for any fate;
Still achieving, still pursuing,
Learn to labor and to wait."

from A Psalm of Life by Henry Wadsworth Longfellow

Our green beans were struggling this year, so we started a few more a week or so ago. They're growing well, so hopefully we get some green beans after all!

What part of your garden is doing the best? Did anything you planted not work out this year?

#longfellow #poetry #aproductivehousehold #planting
I am too excited about these pillow covers. I've I am too excited about these pillow covers.

I've been wanting to replace our old, non-matching throw pillows for months (years?), but geez, pillows are expensive! And that's just not something I was excited to spend money on.

Instead, I found the simplest, most forgiving way to make throw pillow covers. I literally forgot my measuring tools in the kids' rooms while they were asleep and eyeballed the cuts on a bunch of these, and they still turned out great. 

And the best part was that I made all 7 of them for about $20 total! 

They were so easy and so fast and so cheap, and I am way too stoked on throw pillow covers now.

Here's the pattern if you want to make any yourself! ⬇️

https://aproductivehousehold.com/how-to-make-pillow-covers-without-a-zipper

(or just click the link in our bio)

#diythrowpillowcovers 
#diypillowcovers 
#nozipperpillowcovers #envelopepillowcovers 
#envelopethrowpillows
#handsewnpillowcovers #aproductivehousehold
#homemakingonabudget
We’re out in the country enough that we have no We’re out in the country enough that we have no phone service or internet when we’re in our yard.

I love being able to go outside with the kids and not have to even think about my phone going off. It feels so great to be able to just play with them and not be interrupted by notifications, and the kids definitely feel the difference too.

What do you find are some of the best techniques for using your phone as a tool versus a constant distraction during the day? 

I’ve been working on being very intentional about what I’m doing; only getting on when I have a good reason (though this does not always happen). Also, leaving it in one spot until I really need it rather than carrying it around the house.

Anything else that works really well for you?
DIY Outdoor Play Area (swipe to see the 'before' DIY Outdoor Play Area

(swipe to see the 'before' pic)

We really wanted to create a play area that would make mowing around the swing set easier and make the yard look a little bit neater. 

Unfortunately, most of the designs for play areas similar to what we wanted either cost a lot or were super time consuming. We got this play set for free last summer, so making a big investment in the wood chips underneath it was not on our priority list. Haha.

However, Garrett figured out a way to make this in half a Saturday for about $50! Pretty exciting stuff, honestly. 

It's kept the weeds out, looks so much better, and makes mowing a ton easier. 

We shared on the blog exactly how we did it and what materials we used. Link in bio!

#diyplayarea #outdoorplayarea #cheapplayareaforkids
Load More Follow on Instagram

Copyright © 2023 · Anchored Theme on Genesis Framework · Privacy Policy · WordPress · Log in